Introduction
Struggling to provide AI to your staff? Manually pasting prompts into ChatGPT then copying out text can be tedious and inefficient. AnyQuest.ai provides AI workflow automation so you don’t have to juggle prompts, manage text, or write a single line of code.
In this tutorial, we’ll walk you through a demo. We’ll build a AI Discovery Call Research Tool using AnyQuest. By the end, you’ll have a fully automated workflow that generates useful research briefs with just a company homepage URL.
What You’ll Learn
- How to create an AI-driven research assistant in AnyQuest
- Automating sales research tasks using parallel processing
- Merging research data into a structured Discovery Call Brief
- Deploying and testing your AI workflow
This tutorial assumes you already have an account, and a workspace set up at AnyQuest. If you don’t, request Platform Access or contact me for details.
Defining the Use Case
Sales teams need quick, reliable research before a Discovery Call. Our tool will generate a brief containing:
- Key company details
- Decision-makers
- Market positioning
- Common pain points
- Research-backed insights
- Top discovery questions
- Strategic direction
With this workflow, a salesperson will simply input a prospect’s homepage URL, and the AI will generate the complete research brief. Here is a completed example of the discovery research brief created by AnyQuest.
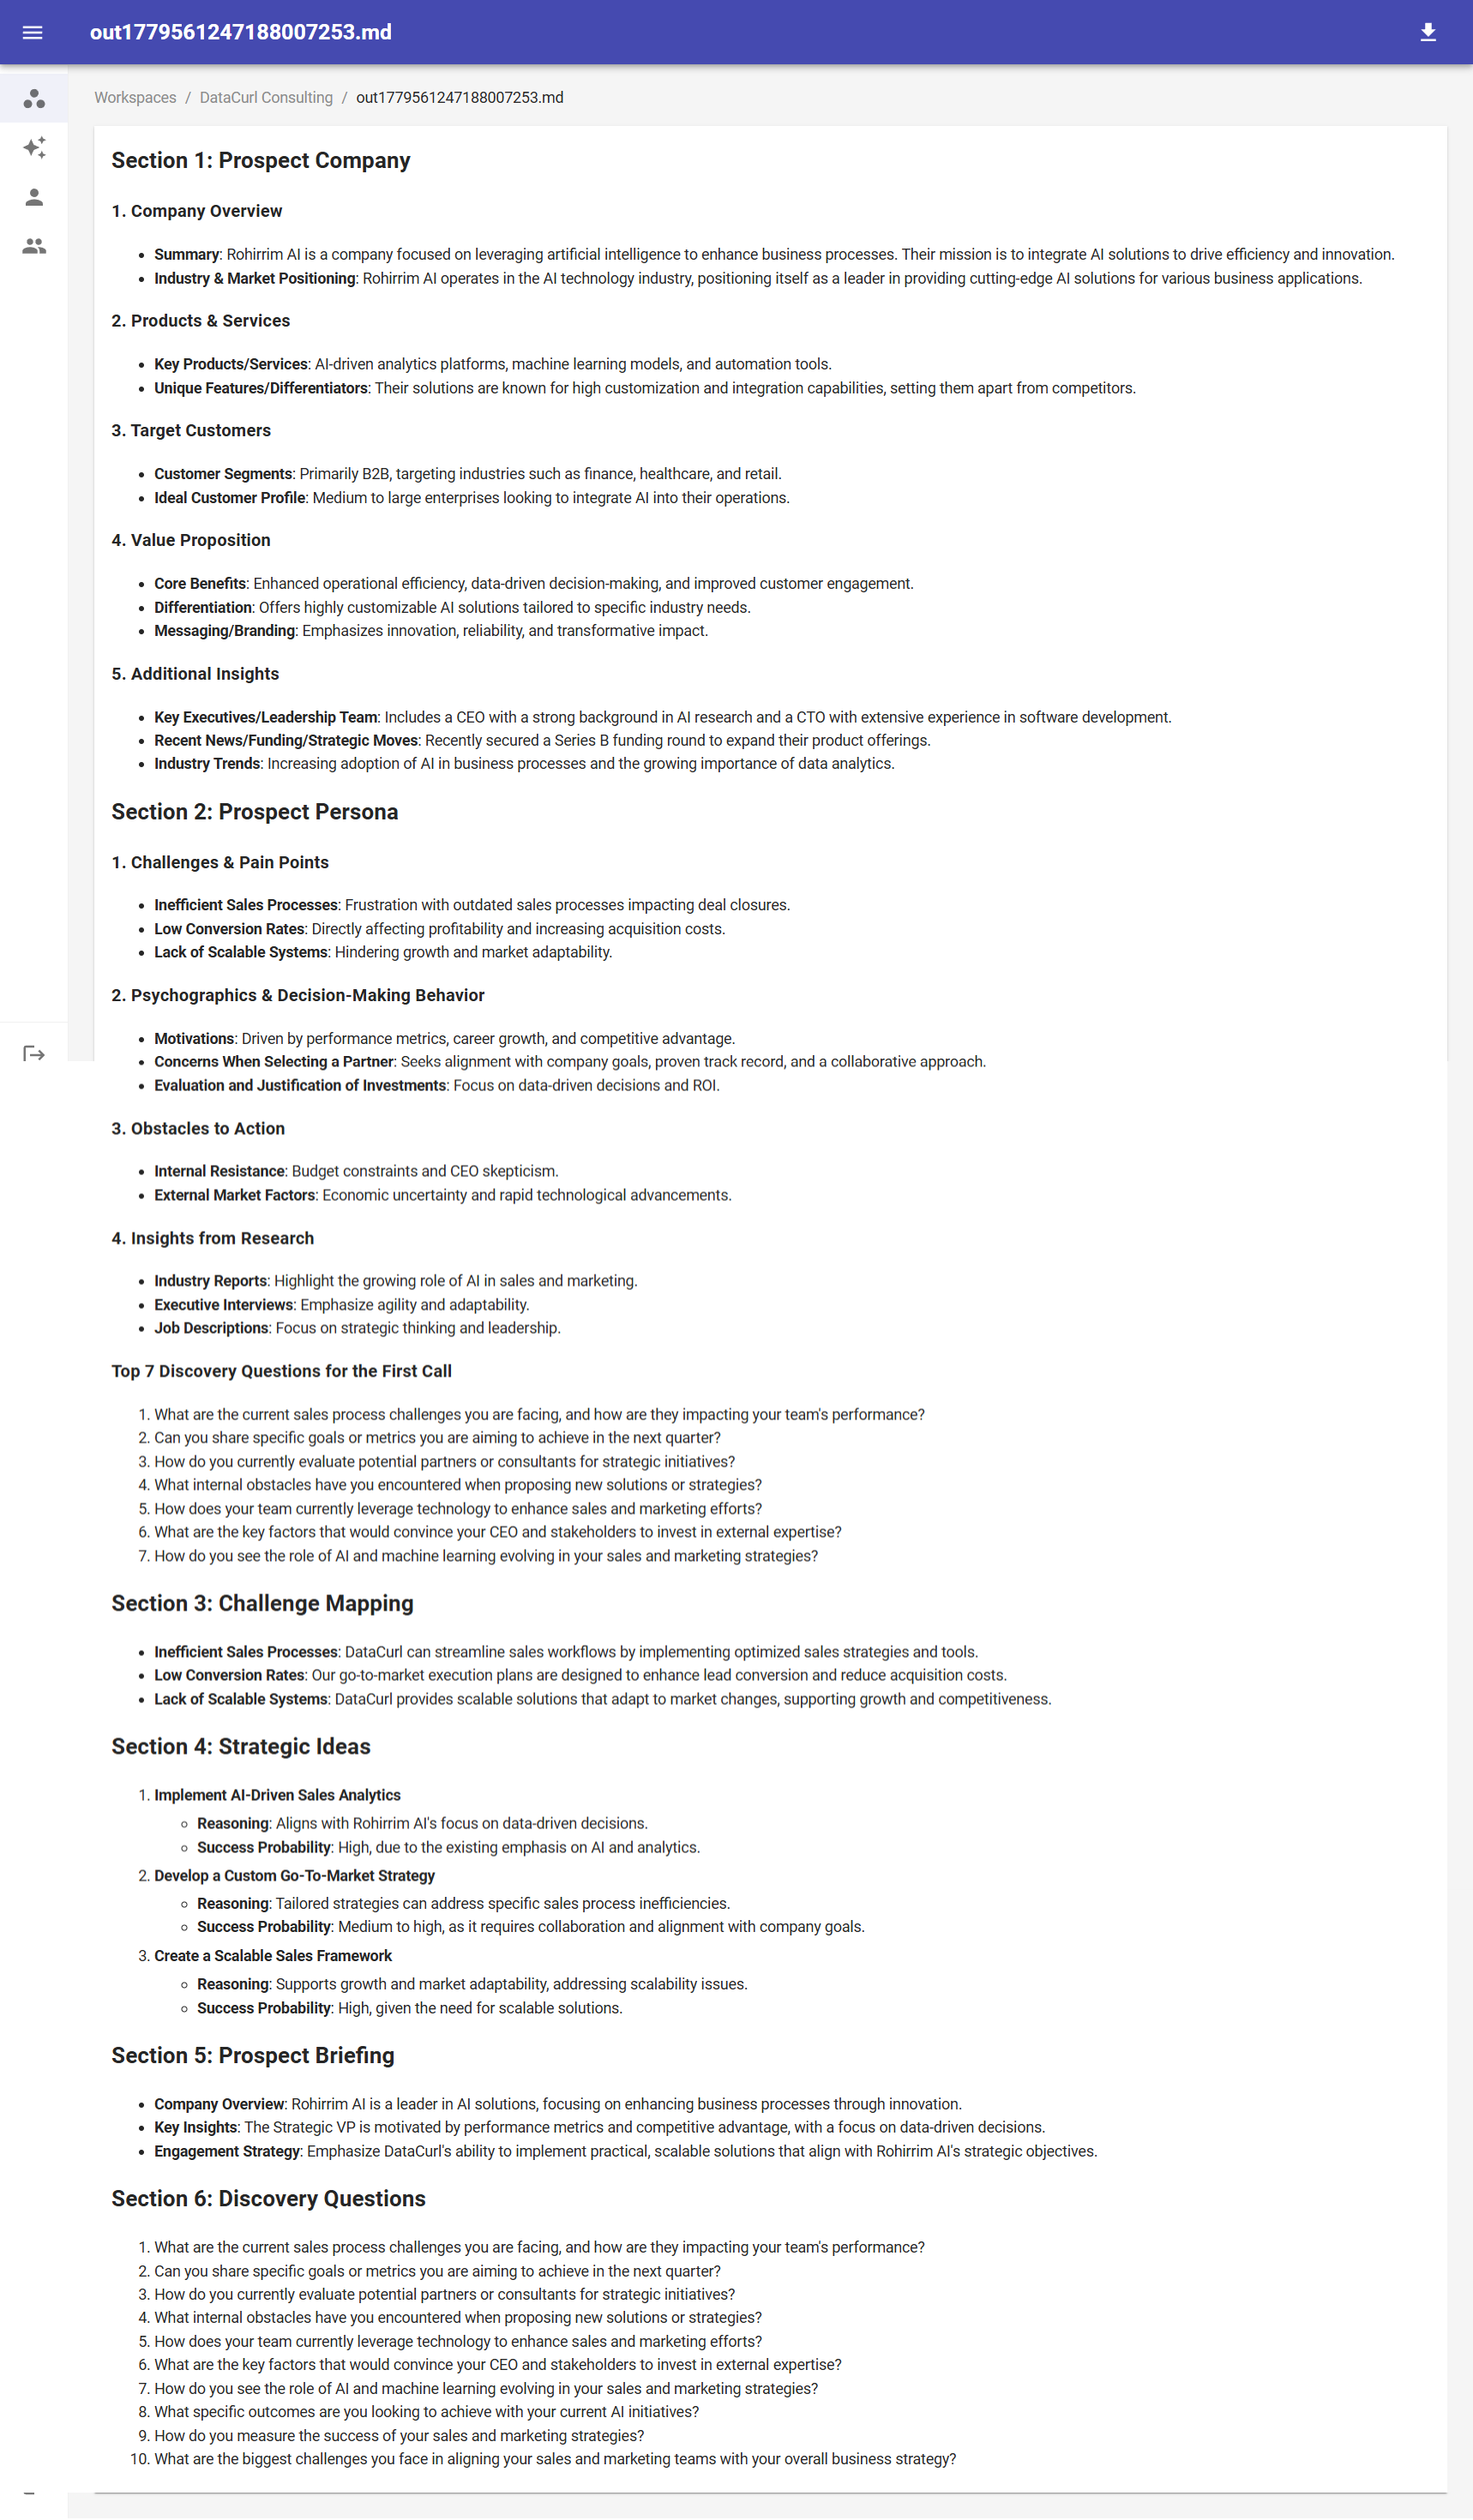
Step 1: Preparing for AI Workflow Automation
- Prepare your AI prompts. (Download our optimized prompts here: [link])
- Log in to AnyQuest.ai and navigate to your Workspace section.
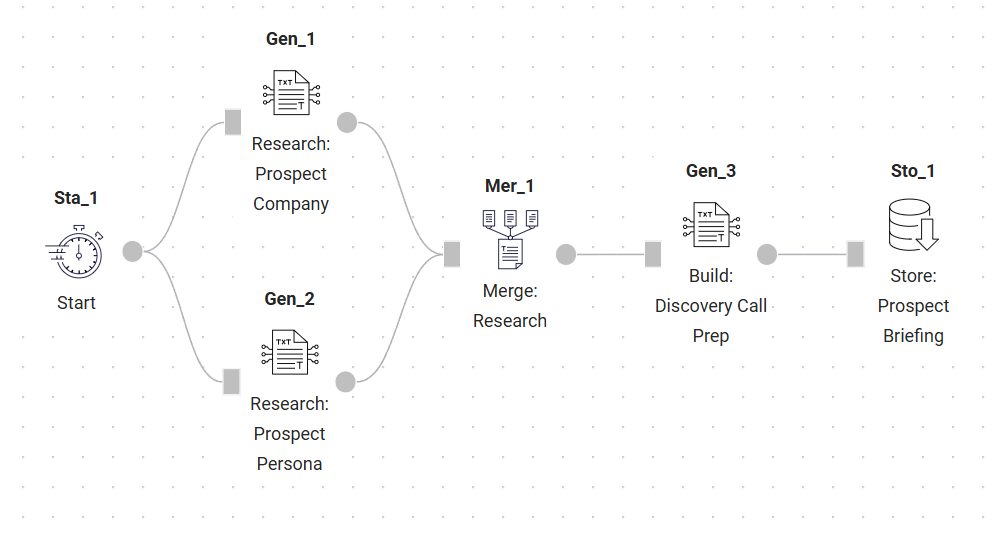
- Refer to the diagram below for the completed component layout. If the automatic names (Sta_1, Gen_1, etc) change, you’ll need to update the prompts accordingly. Just hit double curly braces for the in-scope variables.
Step 2: Creating the Agent
- Go to Agents > Create New Agent.
- Name the agent Discovery Call Report Builder.
- Use the drag-and-drop interface to define each step of the workflow.
Step 3: Setting Up the Start Component
- The Start component gathers input from the user (in this case, the company’s homepage URL).
- Add a Start component.
- Set the Text Input Field to: Company Homepage
Step 4: Handling Research Tasks in Parallel
To speed up data collection, we’ll execute research tasks simultaneously using multiple AI instances.
- Add a Generate component & connect it to Start.
- Set the Prompt to: Research: Prospect Company.
- Validate the double curly brace variable matches the component name for Start (Sta_1) in the diagram and update as needed.
- In the Properties tab:
- Title: Research: Prospect Company
- Model: Default
- Tool: Web Search
- Output Format: Text
- Repeat steps 1-3 for Research: Prospect Persona.
Why this works: Running tasks in parallel reduces processing time, allowing you to retrieve data more efficiently.
Step 5: Merging the Research Data
Once research is gathered, we need to merge the results into a structured format.
- Add a Merge component & connect it to the Research components from Step 4.
- Set the Prompt to: Merge: Research Summary.
- Validate the double curly brace variable matches the generate component names (Gen_1 and Gen_2) and update as needed.
- In the Properties tab:
- Title: Merge: Research
- Format: Markdown
Step 6: Generating the Discovery Call Brief
- The merged research is now passed into the final AI generation step.
- Add a Generate component & connect it to Merge.
- Set the Prompt to: Build: Discovery Call Prep.
- Validate the double curly brace variable matches the merge component name (Mer_1) and update as needed.
- In the Properties tab:
- Title: Build: Discovery Call Prep
- Tool: Web Search
- Output Format: Text
Step 7: Storing the Report
AnyQuest allows seamless storage and retrieval of reports.
- Add a Store component & connect it to the Generate component from Step 6.
- Set Title: Store: Prospect Briefing
Step 8: Testing the AI Workflow Automation Report
Click Run to test the workflow with sample input. You can validate each step using the Activities tab. The final report will be stored in your Workspace > Content area.
Ensure that:
- Data is retrieved correctly.
- Parallel processes run without errors.
- The final report is structured as expected.
Troubleshooting:
- If responses are vague, refine the AI prompts for specificity.
- If data accuracy is inconsistent, adjust web search parameters.
- If response time is too long, optimize parallel tasks.
- If you did not get a generated report in your Content area, check the Agent > Activities tab for a component by component view of what happened.
Step 9: Publishing & Deploying the AI Workflow
- Once testing is successful, click Publish.
- Share the AI-powered tool with your sales team for real-time access.
Final Thoughts & Next Steps
By following these steps, you’ve successfully orchestrated AI workflows without using any code using AnyQuest. This automated tool eliminates the need for manual research, providing real-time insights with AI-powered efficiency. Try experimenting with additional integrations and optimizations to further refine your workflow!
Ready to take your AI and go-to-market process to the next level? Let’s talk.